domingo, 17 de noviembre de 2013

KLIMT'S TREE OF LIFE

This week 1st graders have finished their Trees of Life. They have been observing all the different symbols that Gustav Klimt painted in his tree.
I divided the painting in 4 parts and children said all that they could see: 


GREEN TRIANGLES, CIRCLES, EYES, A BROWN BIRD, STARS, FLOWERS...

After the observation of the 4 parts we joined them and they realized that it was a beautiful and special tree: The Tree of Life by Gustav Klimt.


 Aquesta setmana els alumnes de 1r han acabat els seus Arbres de la vida. Han estat observant els diferents símbols que en Gustav Klimt va pintar al seu arbre.
Vaig dividir el quadre en 4 parts i les varem anar observant per separat. Els nens i nenes anaven dient tot el que veien:

TRIANGLES VERDS, CERCLES, ULLS, UN OCELL, ESTRELLES, FLORS...

Després d'estar una estona observant varem juntar les quatre parts i va aprèixer un arbre molt peculiar a la vegada que preciós: L'arbre de la vida d'en Gustav Klimt.


Children looked at the curvy branches that formed spirals. So we played drawing spiral branches in the air.


Els nens i nenes es varen adonar que les branques eren corbes i que formaven unes formes com caragols anomenades espirals. Així que ens varem divertir dibuixant espirals grans, petites i mitjanes a l'aire.


Then, they started the project drawing the tree with soft wax crayons on an A3 yellow cardboard paper. First they drew a line for the ground, second they drew the trunk and third the curvy branches with the spirals at the end.

 Després, varen començar el projecte dibuixant l'arbre amb ceres toves damunt un A3 de cartolina groga. Primer dibuixaren una línia horitzontal per fer el terra, segon el tronc i tercer les branques corbes amb les espirals al final.


 At the end of the first lesson they coloured the tree mixing brown, red, yellow and orange. These four colours are the ones they decided to use in order to imitate the artist's original painting.

Al final de la sessió varen pintar els arbres mesclant marró, vermell, groc i taronja. Aquests colors són els que ells i elles decidiren usar per imitar l'obra oroginal de l'artista.


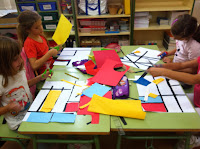
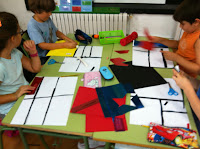
During the second lesson children decorated their Trees of Life with the symbols they had been observing on the first lesson: triangles, circles, flowers, stars, a bird...
I gave them coloured cardboard, magazines, stickers and they cut off and stick all the symbols they wanted.


Durant la segona sessió els alumnes varen decorar els seus arbres de la vida amb els símbols que havíen estat observant a la primera sessió: triangles, cercles, flors, estrelles, un ocell...
Els hi vaig donar cartolines de colors, revistes, gomets i ells varen retallar i enganxar tot allò que varen considerar oportú. 


domingo, 10 de noviembre de 2013

JACK- O' - LANTERNS

2nd graders had fun making this Jack-O'-Lanterns to decorate our classrooms. The idea was to provide a Halloween atmosphere with Jack-O'-Lanterns made by themselves and then ask them to role-play Trick or Treat children tradition.

Els alumnes i les alumnes de 2n s'ho han passat en gran decorant carabasses de Halloween, és a dir, Jack-O'-Lanterns, així és com s'anomenen aquestes carabasses tan significatives d'aquesta festivitat anglosaxona. La idea principal era dona un ambient de Halloween a la nostra classe i més tard dramatitzar el que els nens i nenes fan als països on es celebra Halloween: Anar a demanar carmels a les cases diguent Trick or Treat.

First, we gave them the necessary language to understand the activity:
Primer, els hi varem donar el vocabulari necessari per entendre l'activitat:

-Vocabulary related with Halloween tradition through a Power Point presentation.
-Instructions and material vocabulary: gestures and real material.
-Jack-O'-Lantern (parts of the face): an active story with visual aids.

-Vocabulari relacionat amb Halloween a través d'un Power Point de creació pròpia.
-Instruccions i vocabulari del material a utilitzar: gests i material real.
-Parts de la cara: conte actiu on l'alumnat participava amb moviments (TPR). 


Then, they started drawing a pumpkin, decorating it with scary eyes, nose and mouth.

Llavors, començaren a dibuixar l'esgarrifosa cara de la carabassa, decorant-la amb ulls, nas i boca.


They cut the pumpkin off and put it on a paper roll they made with green cardboard simulating the house yard.

Retallaren la carabassa i la subjectaren al damunt d'un rotllo de paper que varen fer amb cartolina verda simulant l'herba del jardí de la casa.


Jack-O'-Lanterns were ready and we decorated the room with them. So, Justin, the language assistant, went out and dressed up with a Halloween costume. At first children were scared but then they laughed with him.

Les Jack-O'-Lanterns ja estaven preparades per decorar la classe amb elles. Així que, en Justin, l'auxiliar de conversa, es va anar a disfressar. Al principi els nens i nenes es varen espantar  ja que no l'esperaven però finalment tots varem riure!


The last part of the activity was the most interesting for all the students. Justin brought some sweets for them!!
Children simulated the TRICK OR TREAT tradition of asking for sweets to the neighbourhood. They were standing in a line and said TRICK OR TREAT! to get their sweets, and we said thank you saying HAPPY HALLOWEEN!!!

La darrera part de l'activitat va ser la més interessant per tot l'alumnat. En Justin havia portat caramels per ells!
Els nens i nenes dramatitzaren la tradició d'anar a les cases dels veïns demanant caramels tot dient: TRICK OR TREAT. Tots varen fer una fila i quan era el seu torn deien: TRICK OR TREAT! per aconseguir els seus caramels i per donar les gràcies diguerem HAPPY HALLOWEEN!


sábado, 26 de octubre de 2013

FUN WITH MONDRIAN

Two of the most important aspects in Piet Mondrian's artworks are lines and primary colours that is the reason why I have chosen him to be the first artist of the year. Children consolidated their first knowledges about these concepts meeting this famous artist.

Un dels aspectes més importants en l'obra de Piet Mondrian són les línies rectes i els colors primaris, aquesta és la raó per la qual l'he triat per ser el primer artista de l'any. Els nens i nenes consolidaren els seus primers coneixements sobre aquests conceptes coneguent a aquest famós artista.


As a warm up I did a brief introduction of the artist with a Power Point presentation. Children could see a Mondrian's photo and speak about what could they see in his paintings: straight lines, rectangles, squares, red, yellow, blue...

Com a activitat prèvia els hi vaig fer una petita introducció de l'artista amb una presentació Power Point amb el llenguatge adaptat al seu nivell. Els alumnes varen poder veure una foto de l'artista i parlaren del que es veia a les seves obres: línies rectes, rectangles, quadrats, vermell, groc, blau...

 Materials they needed:                                                         Materials necessaris:
-A3 white paper                                                                  -paper blanc A3
-Black cardboard (lines)                                                      -cartolina negra (línies)
-ruler                                                                                   -regla
-pencil                                                                                 -llapis
-red, blue and yellow cardboard                                          -cartolina vermella, blava i groga.
-scissors                                                                              -tissores
-glue                                                                                    -barra de pega


1. Draw black straight lines with a pencil and a ruler.   2.  Cut out the lines with scissors
1. Dibuixar línies rectes en negre amb llapis i regla.        2. Retallar les línies amb les tissores.


3. Think up a lines composition.                                    4. Stick the lines on the paper.
3. Inventar una composició amb les línies.                        4. Enganxar les línies al paper.


5. Cut out rectangles and squares and stick them on some areas creating contrast (measuring with a ruler or using other strategies).
5. Retallar rectangles i quadrats i enganxar-los en algunes zones creant contrast (mesurar amb un regla o emprant altres estratègies).


* First graders used plasticine to fill in areas on their productions.
*Els alumnes de primer empraren plastilina per omplir els espais de la seva producció.


COLOURS AND LINES

We dedicated the first Art lessons of this new school year to lines and colour. On the first lesson children learnt how to draw different types of lines: wavy, curvy, zig-zag, dotted, straight... We played an action game using our bodies to acquire lines vocabulary and at the end they use their imagination to draw an abstract artwork using all types of lines they know. 

Hem dedicat les primeres sessions d'art del curs a la línia i el color. Els nens i les nenes han après com dibuixar els diferents tipus de línies: ondulades, curves, en zig-zag, punts, rectes... Jugàrem a un joc d'acció amb els nostres cossos per començar a adquirir el vocabulari específic de l'àrea. Més tard, dibuixaren les línies que havíen après per produir un dibuix abstracte.

Different Types of Lines (writing center, fine motor, laminate and trace with shaving cream) | best from pinterest
                        

On the second lesson students had to solve a problem. I asked them to paint a rainbow but we only had yellow, red and blue paint. Children started to make hypothesis of  how can they get the rest of the colours. All of them thought that mixing colours would be a great idea, so they tried it out... And it worked!

A la segona sessió, els alumnes varen haver de resoldre un problema: pintar un arc de Sant Martí però només ens quedava pintura groga, vermella i blava. Els nens i nenes començaren a fer hipòtesis per veure com podíen aconseguir la resta de colors. Tots i totes pensaren que barrejar colors seria una molt bona idea, així que ens posarem a experimentar... I va funcionar!


Kira's Crafty Life Blog: Art Lesson with Little Kids: Color Mixing Chart Placemat
They painted a similar mixing colour chart as the one you can see above.
Pintaren un gràfic de mescla de colors similar al que es veu dalt.
                                               

cotton ball paint a rainbow, color mixing activity

At the end of the lesson they got all the colours to pint their awesome rainbows!
Al final de la sessió ja tenien tots els colors necessaris per pintar els seus espectaculars arcs de Sant Martí!

jueves, 22 de agosto de 2013

ART TIMELINE

This year I would like to start an Art Timeline Project implying all the groups which are learning Art in English. Surfing the net I have seen plenty of examples, all of them very interesting and I am sure that they will help us buiding our own Sa Bodega Art Timeline. I have tried to summarize the most important History Art Movements and their artists in the Timeline I expect my pupils to produce... someday! 


Aquest curs m'agradaria iniciar un projecte de Línia del Temps relacionada amb l'art implicant a tots el grups que aprendran Art en anglès. Navegant per Internet he vist molt bons exemples, tots ells molt interessants, estic ben segura de que ens podran ajudar a elaborar la nostra línia del temps d'artística de Sa Bodega. He intentat resumir els moviments artístics més importants i els seus artistes en la línia del temps que espero que el meu alumnat pugui produir algun dia!


CAVE PAINTING 30000-8000 BCE

EGYPTIAN ART 3200-1070 BCE

ANCIENT GREECE 1000 BCE

RENAISSANCE 1400-1600 AD
-Da Vinci
-Michelangelo
-Van Eyck

BAROQUE 1600-1700 AD
-Rembrandt
-Velazquez

IMPRESSIONISM 1870-1890 AD
-Degas
-Renoir
-Manet

POINTILLISM 1880-1900 AD

POST-IMPRESSIONISM/EXPRESSIONISM 1885-1905 AD
-Gauguin
-Cezanne

ART NOUVEAU 1890-1905 AD
-Klimt 1
-Klimt 2
-Klimt 3
-Klimt 4
-Gaudi

FAUVISM 1900-1920 AD
-Matisse

CUBISM 1907-1914 AD
-Picasso 4 

NEOPLASTICISM: DE STIJL 1917-1920s AD

SURREALISM 1924-1930s AD
-Dalí

ABSTRACT EXPRESSIONISM 1945-1960 AD
-Kandinsky 1905-1925 AD
-Kandinsky 2
-Kandinsky 3
-Kandinsky 4

KINETIC ART 1950-1960s AD
-Calder

POP ART 1960s AD


martes, 6 de agosto de 2013

ART CLASSROOM MANAGEMENT. GESTIONEM LA CLASSE D'ART.

We are already halfway through our summer holiday and suddenly some ideas about how I would like my Art lessons to be next year start popping up. A huge number of authors, movements, techniques, projects, materials... invade myself.

But... before getting dirty and transform ourselves into the little artists we want to be we need to create an environment where everybody feels cozy letting our imagination fly without fears and stress.

How can we create this friendly environment?

-Agreeing rules.
-Assigning tasks and jobs' helpers.
-Making up collaborative groups.
-Expressing our new school year wishes.
-Decorating the room.
-Organizing materials.


Estem a l'equador de les vacances d'estiu i ja comencen a aparèixer en el meu cap algunes idees de com m'agradaria que fossin les classes d'Art del proper curs. Infinitat d'autors, moviments, tècniques, projectes, materials, m'envaeixen.

Però...abans d'embrutar-nos les mans i convertir-nos en els petits artistes que estem desitjant ser hem de crear un atmosfera en què tothom es senti còmode per deixar volar la nostra imaginació sense pors, tensions. 


Com podem crear aquesta atmosfera?

-Pactant normes.
-Designant tasques i encarregats.

-Formant grups cooperatius.
-Expressant els nostres desitjos pel nou curs.
-Decorant l'aula.
-Organitzant els materials.